Understanding Storm Damage and Why Quick Action Matters
Knowing how to repair storm damage to your home begins with a methodical approach that prioritizes safety, documentation, and professional help. After a severe storm, seeing missing shingles, broken windows, or water stains can be overwhelming. However, the right recovery plan transforms chaos into a manageable process. For homeowners in Northwest Arkansas, partnering with a team that provides dependable and affordable roofing services is the first step toward restoring not just your property, but your peace of mind.
The essential 7-step process for repairing storm damage to your home is:
- Ensure Safety First: Check for downed power lines, gas leaks, and structural hazards before entering damaged areas.
- Document Everything: Take photos and videos of all damage from multiple angles for insurance claims.
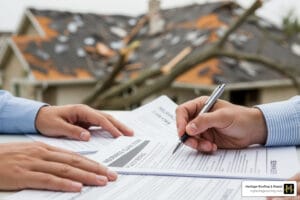
- Contact Your Insurance Company Immediately: Most policies require prompt reporting, often within days.
- Make Temporary Repairs: Tarp damaged roofs, board up windows, and remove standing water to prevent further damage.
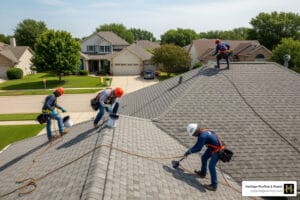
- Hire a Licensed Professional: Get multiple estimates from reputable contractors for permanent repairs.
- File Your Claim: Work with your adjuster and provide all documentation.
- Complete Repairs: Oversee the work and keep all receipts for reimbursement.
Weather-related disasters caused over $92 billion in damages across the U.S. in a single year, with hail damage alone reaching approximately $40 billion in 2024—more than hurricanes and floods combined. These staggering numbers underscore why understanding roof inspection and repair processes is critical for every homeowner.
Time is your enemy after storm damage. Mold can start growing within 48 hours of water exposure. A small roof leak can compromise your home’s structural integrity within weeks. What looks like minor damage on the surface may hide serious problems beneath.
I’m Rex Wisdom, owner of Heritage Roofing & Repair, and my family has spent over 50 years helping homeowners in Berryville and Northwest Arkansas understand how to repair storm damage to your home. We’ve guided countless families through insurance claims, emergency repairs, and full restorations after devastating storms hit our community.
 Safety check with icons for power lines and gas leaks, 2) Camera icon for documentation, 3) Phone icon for insurance contact, 4) Tarp and board for temporary repairs, 5) Contractor with clipboard for professional help, 6) Document with checkmark for claim filing, 7) House icon for completed repairs - how to repair storm damage to your home infographic")
Step 1: Prioritize Safety and Document All Damage

Your first priority after a storm is not your property, but your family’s safety. Once everyone is safe and the storm has fully passed, you can begin the crucial process of assessing and documenting the damage for your insurance claim.
Assess Your Property Safely
After a storm, the scene can be chaotic and dangerous. Before you even think about how to repair storm damage to your home, ensure your safety and that of your loved ones. We recommend taking these immediate steps:
- Look for downed power lines: These are extremely dangerous. Do not approach them, and report them to your utility company immediately.
- Check for gas leaks: If you smell gas, leave your home immediately and call emergency services from a safe distance. Do not turn on or off any lights or appliances.
- Assess structural integrity: Be alert for signs of major structural damage, such as significant cracks in walls, sagging ceilings, or shifted foundations. If you suspect your home’s structure is compromised, do not enter. Contact a professional for assessment.
- Wear protective gear: If you must enter your home or inspect your property, wear long pants, a long-sleeved shirt, sturdy shoes or boots (no flip-flops!), work gloves, and eye protection. A hard hat can also be beneficial if there’s a risk of falling debris.
- Inspect from the ground: For roof damage, use binoculars to inspect your roof from a safe distance on the ground. Avoid climbing onto a damaged roof yourself, as it can be slippery and unstable. For a comprehensive assessment, especially after significant damage, we always recommend a professional roof inspection from experienced professionals.
The time immediately following a storm is considered the third phase of common injury. Your safety is paramount.
How to Document Storm Damage for Insurance Claims
Once it’s safe to do so, thorough documentation is your best friend when dealing with insurance. This step is critical to ensure you receive proper compensation for your claim. Here’s how to do it effectively:
- Take photos and videos: Use your smartphone or a camera to capture every aspect of the damage. Start with wide-angle shots to show the overall context of the damage, then zoom in for close-ups of specific issues. Don’t forget to photograph both the exterior and interior of your home. Capture damage to your roof, siding, windows, fences, and any personal belongings.
- Create a room-by-room inventory: Walk through your home, room by room, and make a detailed list of all damaged or lost items. Include descriptions, estimated value, and, if possible, the pre-storm condition. This can be done by simply recording a video as you walk through, narrating what you see. For a helpful tool, you can download a home inventory checklist.
- Don’t discard damaged items (unless necessary for safety): While it might be tempting to start cleaning up immediately, try to keep damaged items until an insurance adjuster has had a chance to review them. If you must remove something for safety or to prevent further damage, make sure it’s thoroughly documented with photos and videos first.
- Keep detailed notes: Record the date and time of the storm, your observations, and any immediate actions you took. Also, keep a log of all communications with your insurance company, contractors, and emergency services, including names, dates, and summaries of conversations.
Proper documentation can significantly speed up your claim and help avoid disputes, making the process of how to repair storm damage to your home much smoother.
Step 2: Navigating Your Homeowners Insurance Claim

Filing an insurance claim is a critical step in funding your repairs. Acting quickly and understanding your policy are key to a smooth process. Most policies require you to report damage promptly.
Understanding Your Insurance Coverage
After ensuring safety and documenting the damage, your next call should be to your insurance provider.
- Contact your agent immediately: Most insurance policies require prompt notice for storm damage claims, often within a few days of the incident. Delaying can sometimes jeopardize your claim. Your agent can walk you through the initial steps.
- Review your homeowners insurance policy coverage: Standard homeowners insurance policies typically cover weather damage from perils like wind, hail, and snow. For example, if your roof sustained wind damage that lifted shingles or hail damage that created dents and weakened materials, these are usually covered.
- Common exclusions: It’s crucial to understand what your policy doesn’t cover. The most significant exclusion for many homeowners is flood damage. Standard policies generally do not cover flood damage, which requires a separate flood insurance policy, often through the National Flood Insurance Program (NFIP). We’ve seen many homeowners in Northwest Arkansas caught off guard by this, so always review your policy now, not after the storm.
- Replacement Value vs. Actual Cash Value: When reviewing your policy, pay close attention to whether it covers replacement cost value (RCV) or actual cash value (ACV). RCV pays the cost to repair or replace damaged property without deducting for depreciation, which is what we recommend. ACV, on the other hand, pays the depreciated cost, meaning it accounts for the age and wear of the damaged item. This can significantly impact your payout. For more in-depth information on how this affects your roof, see our guide on Homeowners Insurance Roof Damage.
Working with the Insurance Adjuster
Once you’ve filed your claim, an insurance adjuster will be assigned to assess the damage. This is a crucial meeting, and being prepared can make all the difference.
- Replacement Cost Value (RCV) vs. Actual Cash Value (ACV) revisited: As discussed, the type of policy you have will determine how your claim is valued. Be aware that adjusters will use these calculations. If you have an RCV policy, they may initially pay out ACV, with the remaining recoverable depreciation paid once repairs are completed and receipts submitted.
- Deductibles: Understand your deductible—the amount you’re responsible for paying out-of-pocket before your insurance kicks in. Deductibles can be a specific dollar amount or a percentage of your home’s insured value. Some policies also have special deductibles for specific perils, like hail or wind damage, which can be higher.
- The adjuster’s role: The adjuster’s job is to inspect the damage, estimate repair costs, and provide documentation to your insurer to determine your claim settlement. They are sent by your insurer at no cost to you.
- Being present for inspection: We strongly recommend being present when the adjuster visits. This allows you to point out all the damage you’ve documented and ask questions. A reputable contractor, like us, can also be present to offer their expertise on the extent of the damage and advocate for you if there are subtle issues, such as hail damage to siding, that might be overlooked.
- Providing documentation: Have all your photos, videos, and inventory lists ready to share with the adjuster. This comprehensive documentation supports your claim and helps ensure all damage is accounted for. For more detailed advice on this critical step, check out our guide on how to file roof replacement insurance claim with adjuster.
Step 3: Mitigation and Professional Help
Once you’ve ensured safety and contacted your insurer, the next phase is a mix of immediate mitigation and planning for permanent repairs. Deciding between DIY fixes and professional help is crucial for your home’s long-term health.
Temporary DIY Repairs to Prevent Further Damage
While waiting for your insurance adjuster and professional contractors, taking immediate steps to prevent further damage is essential. This is known as “mitigation” and is often a requirement of your insurance policy. These are temporary fixes to protect your home, not permanent solutions.
Here’s what you can do:
- Essential temporary repair supplies: Gather heavy-duty tarps, plywood, roofing nails, a hammer, duct tape, and plastic sheeting. Keep these on hand during storm season.
- Tarping the roof: If your roof has missing shingles or holes, carefully cover the exposed areas with a heavy-duty tarp. Secure the tarp tightly with roofing nails or battens to prevent wind from dislodging it. This is a critical step to stop water intrusion. Our Emergency Roof Tarping Guide provides step-by-step instructions.
- Boarding up windows: If windows are broken, cover them with plywood or thick plastic sheeting to keep out rain, wind, and potential intruders.
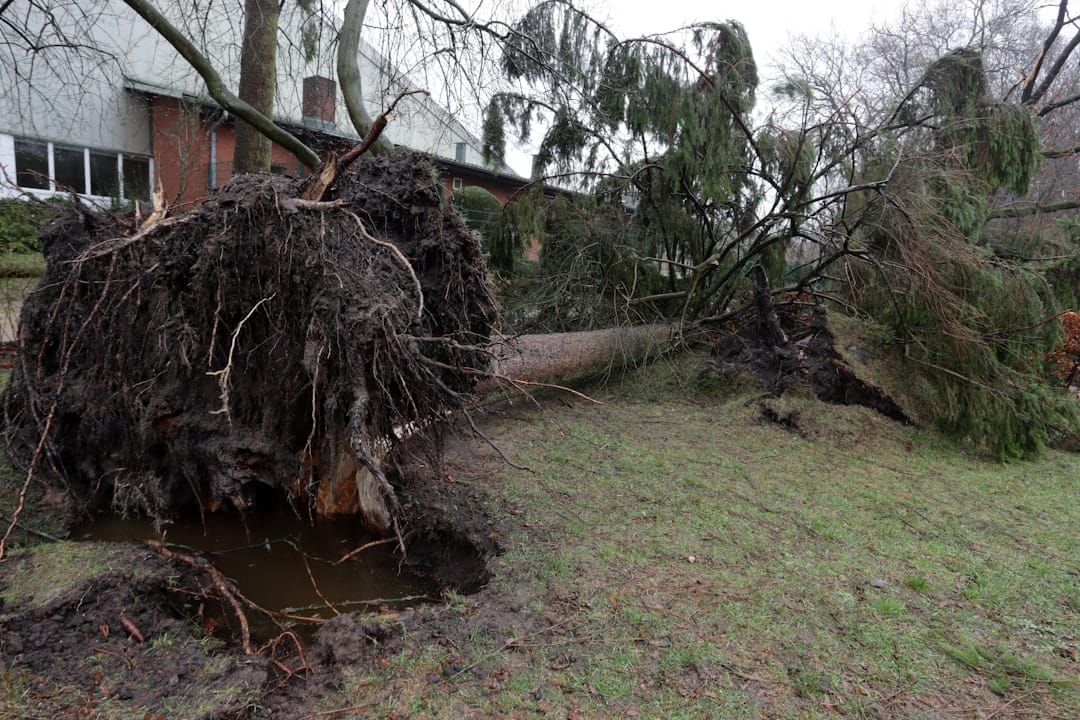
- Removing debris safely: Clear away fallen branches and other debris from your roof, gutters, and around your foundation. Be cautious of sharp objects and structural instability. If there are large downed trees, especially near power lines, leave them to professionals.
- Removing standing water: If you have water intrusion, use buckets, mops, or a wet/dry vacuum to remove standing water. This is crucial because mold can start growing within 48 hours of water exposure, leading to more extensive and costly repairs. Open windows and use fans to aid drying.
- Saving all receipts: Keep meticulous records of all expenses related to temporary repairs, including materials purchased, extra lodging if your home is uninhabitable, or storage costs for personal belongings. These costs may be reimbursable by your insurance company.
Hiring a Professional for Storm Damage Repair
While temporary DIY fixes are important, many types of storm damage require the expertise of a professional. Knowing when to call in the cavalry can save you time, money, and stress in the long run.
- Widespread damage: If your home has suffered extensive damage across multiple areas – roof, siding, windows, and interior – it’s time for professional intervention.
- Structural issues: Any concerns about the structural integrity of your home, such as sagging roofs, bowed walls, or shifting foundations, demand immediate professional assessment. This isn’t a DIY job.
- Electrical problems: If you have exposed electrical wiring, sparking, or water near electrical outlets, call an electrician. Never attempt to fix electrical issues yourself, especially in wet conditions.
- Significant water intrusion: Beyond simple puddles, if you have widespread flooding or persistent leaks, professional water remediation and drying services are essential to prevent long-term issues like mold and rot.
- Emergency roof repair needs: Your roof is your home’s first line of defense. If it’s severely compromised, leading to active leaks or significant exposure, you need rapid professional response.
- Choosing a reputable contractor: This is arguably the most critical decision you’ll make after a storm. Look for licensed and insured contractors with a proven track record in storm damage repair, particularly in roofing.
- Check for license and insurance: Always verify that the contractor is licensed in Arkansas and carries liability and worker’s compensation insurance. This protects you from potential legal and financial headaches.
- Read reviews and check references: Look at online reviews and ask for local references. A contractor with a strong local reputation, like us, will have satisfied customers.
- Avoid “storm chasers”: Be wary of contractors who show up uninvited after a storm, especially if they are from out of state. These “storm chasers” often perform shoddy work, demand upfront payments, and disappear. Always seek out established local businesses.
- Get multiple written estimates: Obtain at least two to three detailed written estimates from different contractors. Compare them carefully, ensuring they clearly outline the scope of work, materials to be used, timelines, and payment schedules. For help finding a trusted expert, see our guide on how to find an experienced roofing contractor.
The Professional Repair Process
Once you’ve chosen a reputable contractor, the professional repair process will typically follow these steps:
- Thorough inspection: Even after your initial assessment, a professional will conduct a detailed inspection to identify all visible and hidden damage. This might involve climbing on the roof, inspecting the attic, and checking for subtle signs of water intrusion or structural stress.
- Detailed estimate: Based on the inspection, your contractor will provide a comprehensive estimate that outlines all necessary repairs, materials, labor costs, and a project timeline. This estimate is crucial for your insurance claim.
- Material selection: You’ll work with your contractor to select appropriate materials for your repairs. For example, if you’ve suffered significant hail damage, you might consider impact-resistant roofing materials for added durability.
- Project timeline and communication: A good contractor will provide a realistic timeline for the repairs and keep you informed throughout the process. We believe in clear, consistent communication so you always know what to expect.
- Final walkthrough and warranty: Once the repairs are complete, you’ll do a final walkthrough with your contractor to ensure everything is done to your satisfaction and meets local building codes. Your contractor should also provide warranties for both materials and workmanship.
Long-Term Recovery and Preparing for Future Storms
After repairs are complete, the work isn’t over. Proper maintenance and proactive upgrades can significantly reduce the impact of the next storm, especially as severe weather events become more common. Hail damage alone was estimated to have reached well into the tens of billions of dollars in 2024.
Post-Repair Maintenance
Think of post-repair maintenance as your home’s long-term health plan. Just because the immediate damage is fixed doesn’t mean you can forget about it.
Here are key tasks to keep your home resilient:
- Regular roof inspections: Even a fully repaired roof needs love. We recommend an inspection at least once a year and after any major storm, even if you don’t immediately see damage. This Old House experts agree that routine inspections are key. This helps catch minor issues before they become major headaches. Check out our free roof inspection complete guide for more details.
- Gutter cleaning: Clogged gutters can lead to water backing up under your roofline, causing leaks and fascia damage. Keep them clear of leaves and debris, especially after storms.
- Checking seals around vents and flashing: Over time, the sealants around roof vents, chimneys, and other penetrations can degrade. Regularly check for cracks or gaps and re-seal as needed to prevent water intrusion.
- Long-term impacts of water damage: Unaddressed moisture can lead to mold growth, rusting, and deterioration of building materials, compromising your home’s air quality and structural integrity. Continued vigilance is necessary.
- Creating a maintenance schedule: Put these tasks on your calendar! A proactive approach to home maintenance will extend the life of your repairs and prepare you for future weather events.
Future-Proofing Your Home
With the increasing frequency and intensity of severe weather events, simply repairing your home might not be enough. Future-proofing your home means making strategic upgrades to minimize potential damage from the next storm.
- Impact-resistant roofing materials: If you’re due for a new roof, consider investing in impact-resistant shingles or other materials designed to withstand hail and high winds. While no roof is completely impervious to extreme forces, these materials offer significantly better protection. This is especially relevant in areas like Northwest Arkansas, where hail damage is a constant concern. Learn more about protecting your home from the elements in our hail damage roof repair guide.
- Reinforcing windows and doors: Upgrade to impact-resistant windows or install storm shutters. For doors, ensure they are securely framed and consider reinforcing garage doors, which are often vulnerable points during high winds.
- Trimming trees: Keep trees and branches trimmed away from your home. Overhanging branches can fall during storms, causing significant roof and structural damage.
- Proper attic ventilation: Good attic ventilation helps regulate temperature and moisture, preventing issues like ice dams in winter and excessive heat buildup in summer, both of which can stress your roof.
- Upgrading to a full roof replacement: If your roof is old or has suffered extensive damage, a full replacement with modern, durable materials can be the best long-term investment for future protection. It ensures your home has the strongest possible defense against the elements.
Community and Financial Assistance Resources
Beyond your insurance policy, various resources can provide assistance after storm damage, helping you with cleanup, temporary housing, and financial aid.
- FEMA assistance: The Federal Emergency Management Agency (FEMA) offers disaster assistance programs, including grants for temporary housing, home repairs, and other disaster-related needs not covered by insurance. Check their website for current eligibility and application procedures.
- State and local programs: Your state and local governments in Arkansas may have specific programs to aid residents affected by storm damage. These can include low-interest loans, grants, or debris removal services. Contact your county or city’s emergency management office for local information.
- Non-profit organizations: Organizations like the Red Cross provide critical support, including shelter, food, and health services. They also offer valuable disaster cleanup & repair tips that can help you safely manage the immediate aftermath. Volunteer groups often organize cleanup efforts in affected communities.
Your Local Storm Damage Experts in Berryville, AR
When you need a trusted partner to help you recover from storm damage in Northwest Arkansas, it’s important to work with a local, experienced team.
Heritage Roofing & Repair
3458 Arkansas State Hwy 221, Berryville, AR 72616
(870) 654-1164
Conclusion
Recovering from storm damage is a marathon, not a sprint. By following a clear process—prioritizing safety, documenting damage, contacting your insurer, and hiring a trustworthy professional—you can steer the restoration with confidence. These steps are essential for restoring not only your home but also your peace of mind. With over 50 years of experience helping homeowners across Arkansas, the team at Heritage Roofing & Repair understands the urgency and complexity of storm recovery. If your home has been damaged, do not wait for the problem to worsen. Take the first step toward recovery by scheduling a comprehensive inspection for expert Storm Damage Roof Repair.