Why EPDM Roof Repair Matters for Your Building
Proper EPDM roof repair is the single most effective way to protect a flat or low-slope commercial roof from water damage and extend its 20- to 25-year lifespan. For over 50 years, property owners across Northwest Arkansas have trusted our comprehensive commercial and residential roofing solutions to safeguard their investments. Whether you’re facing a puncture, seam failure, or general wear, understanding how to properly repair EPDM (ethylene propylene diene monomer) rubber roofing can save you hundreds of dollars and prevent costly water damage to your property.
Quick Guide: Essential Steps for EPDM Roof Repair
- Clean the damaged area – Remove dirt, carbon residue, and oxidation using soap, water, and EPDM cleaner
- Cut and prepare the patch – Size the patch to extend at least 3 inches beyond the damage; round all corners
- Apply primer – Use EPDM-specific primer on both the roof surface and patch
- Install the patch – Apply splice adhesive (for glue-down) or use peel-and-stick patches
- Roll and seal – Use a seam roller to eliminate air bubbles, then apply lap sealant around edges
Cost Comparison: DIY repair typically costs $50-$100 in materials, while hiring a professional runs $600-$1,000+ depending on scope. A properly executed repair can extend your roof’s lifespan significantly.
If you’re dealing with storm damage or extensive leaks, professional roof repair services can assess whether a patch will suffice or if more comprehensive work is needed. Flat and low-pitch roofs are especially vulnerable to water damage, making prompt attention to leaks critical for protecting your building’s interior and structural integrity.
Why EPDM Requires Special Care: Unlike traditional roofing materials, EPDM is a synthetic rubber membrane that’s incompatible with asphalt-based products. Using the wrong sealants or tar can actually cause further damage. Additionally, EPDM naturally sheds a fine layer of carbon black over time, which must be thoroughly removed before any repair attempt—this cleaning step is the single most common reason for repair failures.
I’m Rex Wisdom, owner of Heritage Roofing & Repair, where my family has served Northwest Arkansas for over 50 years. Through decades of hands-on experience, I’ve guided countless property owners through successful EPDM roof repair projects, from minor patches to complex seam restoration. Let me walk you through the proven techniques that ensure a watertight, long-lasting fix.

Understanding EPDM Roof Damage and Repair Essentials
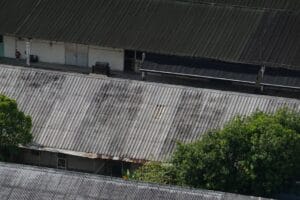
Before starting a repair, identifying the problem and gathering the right supplies are paramount. EPDM roofing systems, known for their durability and cost-effectiveness, are a popular choice for commercial buildings in areas like Fayetteville and across Northwest Arkansas. However, even the toughest membranes can succumb to damage over time. Understanding the common culprits behind EPDM roof issues is the first step toward a successful EPDM roof repair.
EPDM roofs can suffer from various forms of damage. Punctures from falling debris, dropped tools, or careless foot traffic are common. Seam separation is another frequent issue, often due to age, the continuous degradation and brittleness of the rubber, or the material’s natural tendency to shrink. Our research shows that EPDM rubber can shrink on average 3% during its lifespan, and this shrinkage, combined with degradation, can cause seams to fail, especially within the first three years after installation. UV degradation and general membrane deterioration also play a role, making the rubber brittle and prone to cracking.
Unlike other roofing types, EPDM is a synthetic rubber membrane that is uniquely incompatible with asphalt-based products. This is a critical insight: using incompatible materials like roof cement flashing or aluminum coatings can contaminate the rubber and lead to further, more severe damage. Therefore, using the correct, specialized materials is non-negotiable for a successful EPDM roof repair.
Here’s a breakdown of common causes for EPDM roof damage:
- Punctures: Often caused by sharp objects, heavy foot traffic, or falling debris.
- Seam Failure: Weak points in EPDM installations for many years. Field experience shows that seams, initially watertight, can develop defects within the first three years. This is exacerbated by the shrinking of the EPDM membrane.
- Membrane Shrinkage: EPDM rubber shrinks on average 3% during its lifespan. This shrinkage can pull at seams and terminations, creating stress and leading to leaks.
- UV Degradation: While EPDM is highly resistant to UV rays, prolonged exposure can still contribute to the membrane becoming brittle over decades.
- Foot Traffic: Areas of heavy foot traffic are especially subject to damage from abrasion and cuts to the membrane.

Tools and Materials Checklist
Having everything on hand before you climb the ladder makes the job safer and more efficient. We’ve learned from over 50 years of experience that preparation is key to any successful roofing project.
Here’s a comprehensive list of what you’ll need for an effective EPDM roof repair:
Tools:
- Heavy-duty scissors: For precise cutting of the EPDM patch.
- Utility knife: Useful for trimming and preparing the damaged area.
- Soft-bristled scrub brush: Essential for cleaning the membrane without causing abrasion (never use wire bristles!).
- Clean cotton rags: For cleaning and applying various solutions.
- Paint brushes: For applying primer and adhesive evenly.
- Hand-held seam roller: Crucial for ensuring a strong bond and eliminating air bubbles in the patch.
- Caulk gun: For applying lap sealant around the edges of the repair.
Materials:
- EPDM patch/cover tape (minimum 0.060″ or 60-mil thick): Ensure it’s large enough to extend at least 3 inches beyond the damage. You can also use peel-and-stick EPDM patch, cover tape, or flashing tape.
- EPDM membrane cleaner: Specifically formulated to remove dirt, oxidation, and carbon black residue.
- EPDM primer: Prepares the surface for optimal adhesion of the patch and adhesive.
- Splice adhesive (for glue-down patches): Designed to create a strong, lasting bond between EPDM surfaces.
- EPDM lap sealant: Applied around the edges of the patch to create a watertight seal.
For those looking for a convenient solution, you can often find comprehensive repair kits that include many of these items. See this repair kit on Amazon for an example of what’s available.
Safety First: Preparing for Your Repair
Working on any roof carries inherent risks, whether it’s a small residential building in Fayetteville or a large commercial structure. Always prioritize safety to prevent accidents. We can’t stress this enough – your well-being is paramount.
- Always follow roofing safety guidelines provided by OSHA. These guidelines are there to protect you.
- Work on a dry, calm day: Moisture and wind can make the roof surface slippery and unstable, significantly increasing the risk of falls.
- Use a sturdy, properly secured ladder: Ensure it extends at least three feet above the edge of the roof and is placed on stable ground.
- Wear non-slip footwear and gloves: Good traction is critical, and gloves protect your hands from chemicals and sharp objects.
- Never work alone: Always have someone nearby who can assist you or call for help if an accident occurs.
For professional guidance on safety or a comprehensive roof assessment in the Berryville area, you can always reach out to our team.
Heritage Roofing & Repair
3458 Arkansas State Hwy 221, Berryville, AR 72616
(870) 654-1164
Your Step-by-Step Guide to EPDM Roof Repair
With your materials gathered and safety plan in place, you can confidently begin the EPDM roof repair. This detailed process focuses on patching a common puncture or tear, which is arguably the most frequent type of EPDM repair we encounter. Following these steps carefully ensures a watertight, long-lasting bond.
Step 1: Essential Surface Preparation for EPDM Roof Repair
This is arguably the most critical step in any EPDM roof repair. Failed repairs are almost always due to improper cleaning and surface preparation. Over time, EPDM roofing develops a fine layer of black carbon dust on its surface as small amounts of the carbon black material used during manufacturing migrate out of the membrane. You might not even be able to see it, but it’s there, and it will prevent proper adhesion if not carefully removed.

Here’s how we ensure a perfectly prepped surface:
- Scrub the area with soapy water: Begin by scrubbing the entire damaged area, extending at least a foot beyond the damage in all directions, with a soft-bristled scrub brush and warm soapy water. We often recommend a good all-purpose cleaner like Spic and Span, as it’s effective and doesn’t leave a residue. Repeat this process until all visible dirt and grime are gone.
- Rinse thoroughly with clean water: It’s crucial to rinse away all soap residue. Use clear water and ensure no suds remain.
- Dry the area completely: Use clean cotton rags to thoroughly dry the area. Any moisture left behind can compromise the bond.
- Use a designated EPDM cleaner/splice wash: After the initial cleaning and drying, apply a specialized EPDM membrane cleaner (also known as a splice wash) to a clean rag and vigorously wipe down the entire repair area. This step removes the invisible carbon black film and any remaining contaminants. The cleaned area should appear dark gray and uniform, with no streaks or black residue on your cleaning rag. If the rag comes away black, keep cleaning! This is your guarantee of a clean surface ready for repair.
Step 2: Cutting and Priming the Patch
A properly sized and prepared patch is key to a durable fix. Think of it as tailoring a solution specifically for your roof’s needs.
- Cut the EPDM patch: Measure the damaged area and cut your EPDM patch to extend at least 3 inches (some sources recommend 2 inches, but we prefer 3 for extra security) beyond the damage in all directions. For example, a pinhole-sized puncture would require at least a 6″ x 6″ patch. This generous overlap ensures the patch covers the entire damaged section and has ample surface area to bond securely to the healthy membrane.
- Round the corners of the patch: Using your heavy-duty scissors, carefully round all corners of the patch. This seemingly small detail is vital; sharp corners are prone to snagging, lifting, and eventually delaminating over time. Rounded corners help prevent this, ensuring a longer-lasting repair.
- Apply EPDM primer: Using a clean paintbrush or roller, apply a thin, even layer of EPDM primer to the thoroughly cleaned roof surface where the patch will be applied. Extend the primer slightly beyond the edges where the patch will sit. If you’re using a glue-down patch, also apply primer to the back of the patch itself. Primer is essential as it prepares the EPDM surface, activating it for optimal adhesion with the splice adhesive or the self-adhering patch. Allow the primer to dry completely according to the manufacturer’s instructions, typically until it’s tacky but doesn’t transfer to your finger.
Step 3: Applying the EPDM Patch
When it comes to applying the patch, you typically have two main options: pressure-sensitive (peel-and-stick) or glue-down. Each has its advantages, and the application differs slightly.
| Feature | Pressure-Sensitive (Peel-and-Stick) | Glue-Down |
|---|---|---|
| Ease of Use | Easier for DIY | More technique-sensitive |
| Adhesive Needed | No separate adhesive needed | Requires applying splice adhesive to both surfaces |
| Bond Strength | Good, especially for minor repairs | Often provides a stronger, more permanent bond |
| Application | Remove backing and apply | Apply adhesive, wait for tackiness, then apply patch |
- For pressure-sensitive patches: These are often the easiest option for DIYers. Once your surface is primed and dry, simply remove the protective film backing from the patch. Carefully position the patch over the damaged area, ensuring it’s centered and covers the damage with the required overlap. Press it firmly into place, working from the center outwards to prevent air bubbles.
- For glue-down patches: This method, while more technique-sensitive, can provide a stronger, longer-lasting bond, especially for more extensive repairs.
- Apply a thin, even layer of EPDM splice adhesive to both the primed roof surface and the primed back of your patch. Use a paintbrush to ensure full, uniform coverage.
- Wait for the adhesive to “flash off” or become tacky. This usually takes about 5-15 minutes, depending on temperature and humidity. The adhesive is ready when it no longer strings when you lightly touch it with a clean, gloved finger. Patience here is crucial; applying too soon will result in a weak bond.
- Carefully position the patch over the damaged area. Once the adhesive-coated surfaces touch, they will bond strongly, so precise placement is important. Try to roll the patch onto the surface rather than dropping it flat, to minimize trapped air and wrinkles.
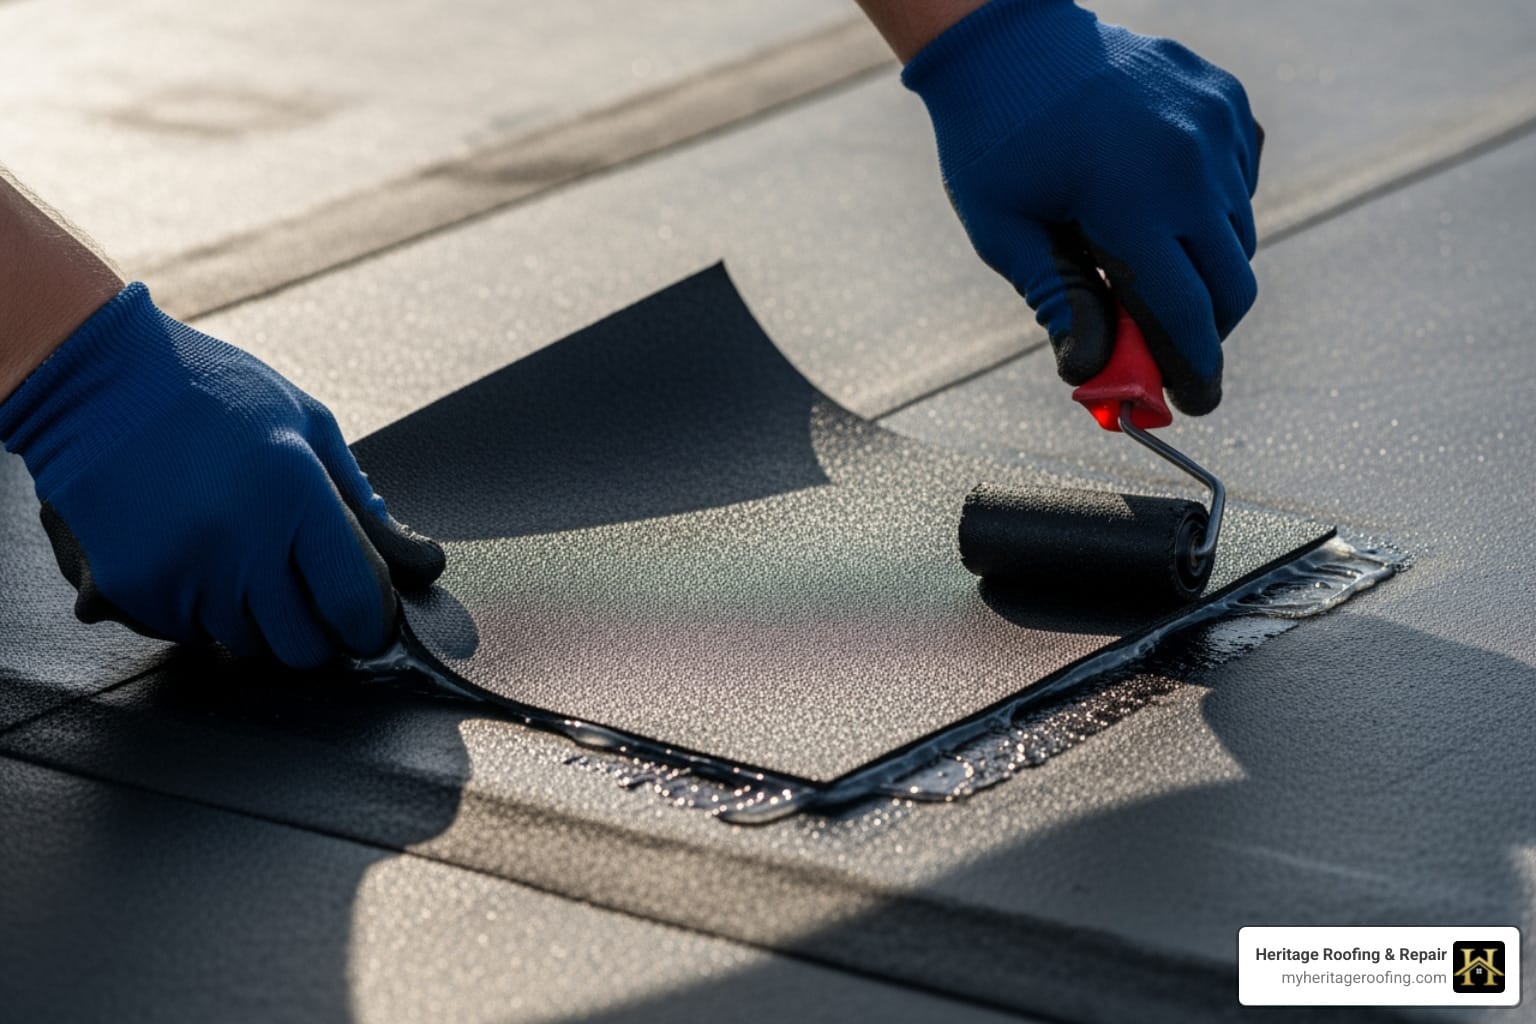
Step 4: Ensuring a Watertight Seal
Properly bonding the patch and sealing its edges is the final, crucial step to ensuring your EPDM roof repair is watertight and built to last.
- Use a hand-held seam roller: Immediately after applying the patch (whether peel-and-stick or glue-down), use a hand-held seam roller to apply firm, consistent pressure across the entire patch. Work from the center outwards to push out any trapped air bubbles and ensure maximum adhesion between the patch and the existing EPDM membrane. This step is non-negotiable for a strong bond.
- Apply EPDM lap sealant: Wait at least 4 hours after rolling the patch (or until the next day if no rain is forecast). Then, apply a thick, continuous bead of EPDM lap sealant around the entire perimeter of the patch where it meets the existing roof membrane. The bead should be about 3/8-inch wide.
- Smooth the sealant: Use a tool like an old credit card or a gloved finger to smooth and flatten the sealant, feathering it over the edge of the patch and onto the surrounding roof surface. This creates an additional barrier against water intrusion and helps blend the repair into the existing roof.
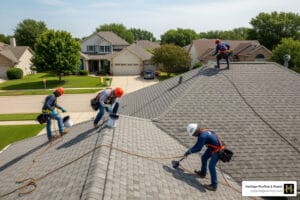
Common Mistakes and When to Call a Professional
While a DIY EPDM roof repair is certainly possible for minor punctures, it’s incredibly important to know what to avoid and when the job is simply too big or complex to handle yourself. A professional inspection can often identify widespread issues you might miss, giving you a clearer picture of your roof’s overall health.
Common Mistakes to Avoid in EPDM Roof Repair
Making one of these common errors can lead to a failed patch, continued leaks, and more significant water damage down the line. We’ve seen these mistakes lead to costly secondary repairs.
- Using asphalt-based sealants or tar: As we mentioned, EPDM is incompatible with asphalt. These products will degrade the EPDM membrane, leading to cracks, swelling, and further leaks. Always use EPDM-specific products.
- Inadequate surface cleaning: This is the number one reason for failed EPDM repairs. If the carbon black film and contaminants aren’t completely removed, your patch simply won’t stick, no matter how much adhesive you use. The EPDM Roofing Association emphasizes that proper surface preparation is foundational to effective repairs.
- Not rounding the patch corners: Sharp corners on a patch create stress points that are prone to lifting and peeling, especially with temperature fluctuations and roof movement. Rounded corners distribute stress more evenly.
- Stretching the patch during application: EPDM is elastic, but stretching it during application can lead to the patch pulling back and creating tension, which weakens the bond and can cause premature failure. Apply it gently and roll it without stretching.
- Applying lap sealant before the adhesive has cured: Giving the adhesive time to cure (at least 4 hours) ensures that the primary bond is fully established before you introduce the sealant. Applying sealant too soon can trap solvents and hinder the curing process.
When to Call a Professional Instead
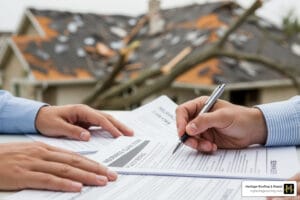
A DIY fix isn’t always the answer, and knowing your limits can save you a lot of headache and money in the long run. For complex or extensive damage, professional intervention is necessary to protect your property. While you can save $300-$600 or more by doing it yourself, a professional repair might be a better investment in specific scenarios. Hiring a pro for a complex repair can cost $600-$1000+ per repair, or even $1,000 to $5,000 a day for a service team, but it prevents catastrophic failure and ensures warranty compliance.
Consider calling in the experts at Heritage Roofing & Repair if you encounter any of the following:
- Extensive damage: If you have multiple punctures or tears in one area, or if the damage is larger than one square foot, a simple patch might not be sufficient. If an EPDM system sustains more than six punctures in any 100 sq ft area, the entire area may need to be overlaid with new membrane rather than just patched.
- Leaks at seams or flashing: These are often more complex to repair correctly than simple punctures. Seams are inherent weak points in EPDM roofing and require specialized techniques to ensure a lasting seal.
- Damage larger than one square foot: While small patches are manageable, large areas of damage often indicate underlying issues or require larger, more intricate repairs that are best left to professionals.
- If the roof is over 20 years old: The typical lifespan for an EPDM rubber roof is 20 to 25 years. If your roof is nearing the end of its expected life, localized repairs might be a temporary fix for a roof that needs a full replacement.
- If you see signs of wet insulation or structural damage: This indicates a long-standing or severe leak that has compromised more than just the EPDM membrane. These situations require a comprehensive assessment and repair plan from experienced professionals.
- If you’re uncomfortable working at heights or lack proper safety equipment: Safety is paramount. If you’re not confident, it’s always better to call a professional.
For expert assistance with your roof repair in Berryville, Fayetteville, Harrison, and across Northwest Arkansas, our team is ready to help.
Frequently Asked Questions about EPDM Repair
We often get questions from property owners about their EPDM roofs. Here are some of the most common ones we hear:
What’s the difference between repairing an RV roof and a commercial roof?
The core principles of cleaning, priming, and patching for EPDM roof repair are fundamentally the same, whether it’s on an RV in a campground or a commercial building in Berryville. However, there are nuances. RV EPDM is often thinner (sometimes 45-mil compared to 60-mil for commercial), and repairs must account for the constant flexing, vibration, and movement of the vehicle. RV roofs also often contend with different types of roof penetrations (vents, AC units) and edge details. Commercial repairs, conversely, focus on long-term static durability and often involve larger areas and heavier-duty materials, though the methodical approach to cleaning and adhesion remains consistent.
How long does an EPDM roof patch last?
When done correctly with the right EPDM-specific materials, a professional-grade EPDM patch should last for the remaining life of the roof. The key to its longevity lies in achieving a perfect bond and a watertight seal. This means meticulous surface preparation, proper adhesive application, thorough rolling to remove air bubbles, and a well-applied lap sealant around the perimeter. A patch is only as good as its weakest link, so cutting corners on any step can significantly reduce its lifespan.
Are there environmentally friendly EPDM repair options?
Yes, environmental considerations are increasingly important in roofing. You can look for low-VOC (Volatile Organic Compound) primers, adhesives, and sealants, which reduce harmful emissions during application. Furthermore, the very act of performing a proper EPDM roof repair is environmentally friendly. By extending the serviceable life of an existing roof, you prevent old roofing material from prematurely ending up in landfills, reducing waste and the demand for new material production. This sustainable approach aligns with our commitment to responsible roofing practices.
Protect Your Investment with Proper EPDM Maintenance
A successful EPDM roof repair can add years to the life of your roofing system, protecting your building from the elements and saving you from a costly full replacement. While we’ve provided a detailed guide for minor repairs, proper maintenance is your best long-term strategy. Regular inspections, especially after severe weather, and keeping your roof clear of debris can prevent small issues from becoming major headaches.
By using the correct tools, materials, and techniques, you can effectively patch minor damage to your EPDM roof. However, for widespread issues, complex seam failures, or if you’re ever in doubt about the scope of the repair, the expertise of a professional is invaluable. With over 50 years of experience serving Northwest Arkansas, Heritage Roofing & Repair provides dependable, affordable, and quality craftsmanship. We specialize in storm damage repair and insurance claims, ensuring your commercial property is protected. If your building needs a comprehensive assessment or professional repair, our team is here to help you secure your investment.