Asphalt Shingle Repair: Fast Fixes That Prevent Costly Damage
Asphalt shingle repair is essential maintenance that protects your home from water damage and costly structural issues. Asphalt shingles cover about 70% of U.S. homes and typically last 15–30 years, but even a single cracked, curled, or missing shingle can open a pathway for leaks. If you’re looking for a trusted Northwest Arkansas roofing company, our team can help you assess damage and make smart, timely repairs.
When shingles crack, curl, or go missing, they create weak spots where water can seep into your roof deck and attic.
Quick Reference: Common Asphalt Shingle Repairs
- Missing shingles: Remove old nails, slide in new shingle, secure with roofing nails
- Curled shingles: Apply sealant underneath, press down, weigh for 24 hours
- Cracked shingles: Seal under and over crack, smooth with putty knife
- Loose shingles: Re-secure with roofing cement and additional nails
- Call professionals for: Multiple damaged shingles, structural damage, steep roofs
The good news? Most shingle problems are fixable with basic tools and some know-how. Asphalt shingles typically last 15-30 years, but prompt repairs can extend their lifespan significantly. Small fixes today prevent major roof replacement costs tomorrow.
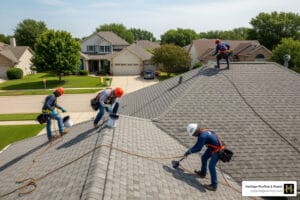
Weather in Arkansas can be tough on roofs. From summer heat to winter storms, your shingles take a beating year-round. Regular maintenance and quick repairs keep your home dry and protected.
I’m Rex Wisdom, owner of Heritage Roofing & Repair, where my family has been serving Northwest Arkansas for over 50 years. Through decades of asphalt shingle repair work, I’ve seen how addressing small issues early saves homeowners thousands in major repairs down the road. If you’re looking for dependable, quality craftsmanship, we invite you to learn more about Heritage Roofing & Repair.

Spot Problems Early: How to Identify Shingle Damage Before It Leaks
Before we dive into fixing anything, the first and most crucial step in any asphalt shingle repair is to accurately identify the problem. Think of your roof as your home’s first line of defense; knowing its weak points is key to keeping your fortress dry and secure. Many homeowners wonder how to spot shingle damage. We recommend performing visual inspections of your roof at least twice a year—preferably in spring and fall—and especially after severe weather events like strong winds or hail.
Here are the common types of damage that affect asphalt shingles:
- Curling Shingles: This is one of the most common signs of aging or moisture issues. Shingles can curl in two ways: “cupping,” where the edges turn upward, or “clawing,” where the edges stay flat but the middle rises. This can be caused by aging, moisture, or even poor installation. Curled shingles are vulnerable to wind damage and can easily lift, allowing water to seep underneath.
- Cracked or Split Shingles: Extreme temperatures and UV radiation can cause shingles to become brittle and crack or split. These cracks, even small ones, create direct pathways for water to penetrate your roof’s underlayment.
- Missing Granules: The tiny, ceramic granules on the surface of your asphalt shingles do more than just provide color; they protect the asphalt layer from the sun’s harsh UV rays. Over time, these granules wear off due to weathering, foot traffic, or hail. If you notice large amounts of granules in your gutters or downspouts, it’s a clear sign your shingles are deteriorating. Missing granules expose the asphalt to direct sunlight, accelerating its breakdown.
- Blistering: Small, raised areas or “blisters” on the shingle surface can indicate trapped moisture or excessive heat in the attic. While not immediately a leak, these blisters can eventually crack, leading to water intrusion. Poor ventilation is a common culprit here, causing the roof to overheat and speeding up material deterioration.
- Missing or Torn Shingles / Wind Damage: High winds are notorious for lifting, tearing, or completely blowing off shingles. This leaves exposed areas of your roof deck and underlayment, making your home highly susceptible to leaks. After severe storms—especially hail—consider a professional assessment; hail as small as 1 inch can bruise shingles and reduce their remaining life (see the Insurance Institute for Business & Home Safety: https://ibhs.org/hail/).
- Water Stains in Attic: If you find water stains on your ceiling or in your attic, it’s a definitive sign of a roof leak. Tracing the leak’s source can be tricky, as water often travels along rafters before dripping. One clever trick is to tape magnets to the underside of the roof at the leak’s high point, then use a compass on the roof to locate the magnets and mark the spot. This helps pinpoint the exact area for asphalt shingle repair.
- Debris in Gutters: While some granule loss is normal, excessive debris, especially shingle granules, in your gutters and downspouts indicates significant shingle deterioration.
For a more in-depth understanding of what to look for, the InterNACHI series on Mastering Roof Inspections offers valuable insights for even the most observant homeowner. When in doubt, a professional roof inspection can provide a thorough assessment.
Gearing Up: Essential Tools & Safety for Shingle Repair
Alright, so you’ve spotted the trouble. Now it’s time to get ready for action! Before you even think about climbing onto your roof, safety must be your absolute top priority. Working on a roof can be dangerous, and we want you to stay safe and sound.

Here’s a list of essential tools and materials for most asphalt shingle repair jobs:
- Safety Glasses and Gloves: Protect your eyes from debris and your hands from sharp edges.
- Slip-Resistant Shoes: Essential for maintaining traction on a sloped surface. Never work on a wet or dew-covered roof!
- Sturdy Ladder: Ensure it’s stable on solid ground and extends at least three feet above the roof edge.
- Hammer or Roofing Nail Gun: For securing new shingles.
- Pry Bar (Flat Bar or Shingle Ripper): Crucial for gently lifting shingles and removing old nails without damaging surrounding areas.
- Utility Knife: For cutting new shingles to size or trimming damaged sections.
- Replacement Shingles: Make sure they match your existing ones as closely as possible in color and style. It’s always a good idea to keep a bundle or two from your original roof installation for just such occasions.
- Roofing Nails: Typically 1 ¼-inch galvanized roofing nails are recommended to prevent rust.
- Roofing Cement/Sealant: Essential for sealing shingle tabs, cracks, and ensuring a watertight repair. A caulking gun will make application easier and more precise.
- Putty Knife: For spreading sealant smoothly.
- Chalk Line & Measuring Tape: For precise alignment, especially when replacing multiple shingles.
- Safety Harness (Optional but Recommended): Especially for steep roofs or if you’re working alone.
Safety First: A Few Non-Negotiables for Roof Work
- Check the Weather: Only undertake asphalt shingle repair on a warm, dry day. Shingles are more pliable in warmer temperatures, making them less likely to crack when handled. You also need at least 24 hours of dry conditions for sealants and adhesives to properly set. Avoid working in windy conditions or when rain is expected.
- Work with a Buddy: If possible, have someone assist you or at least be aware that you are on the roof. They can help with tools, provide support, and call for help if needed.
- Clear the Area: Remove any debris, branches, or loose items from the roof surface before you start.
- Ladder Placement: Always ensure your ladder is on a stable, level surface.
- Don’t Overextend: Work within your comfortable reach. It’s better to reposition your ladder than to stretch dangerously.
- Know Your Limits: If the repair seems too complex, the roof is too steep, or you simply feel uncomfortable, it’s always best to call a professional. We’ll discuss this more later!
Your Guide to DIY Asphalt Shingle Repair
Now that you’re geared up and safety-conscious, let’s get to the fun part: fixing those shingles! The goal is to protect your home, and with these simple steps, you’ll be well on your way.

How to Replace a Missing or Damaged Shingle
Replacing a single missing or severely damaged shingle is one of the most common asphalt shingle repair jobs. Here’s our step-by-step process:
- Prepare the Area: On a warm, dry day (remember, pliable shingles!), gently lift the shingle directly above the damaged or missing one. You might need a pry bar to carefully break the sealant bond that holds the shingles together. Be gentle, especially if the shingles are older and brittle. If the nails are driven deep, you can sometimes go into the attic and drive them out from below by about 1/4 inch to make them easier to remove from the top.
- Remove the Old Shingle: Once the overlying shingle is lifted, you’ll see the nails holding the damaged shingle in place. Use your pry bar to carefully slip under the shingle and pry up the nails. Remove all nails securing the damaged shingle, then slide it out from under the overlapping shingle above. Be careful not to tear the underlayment underneath. If there’s old roofing cement or debris, clean the area to create a flat surface for the new shingle.
- Slide in the New Shingle: Take your new, matching shingle and carefully slide it into the opening. Make sure it’s aligned perfectly with the surrounding shingles and that its bottom edge lines up with the bottom edge of the shingles in the same course.
- Secure with New Nails: Lift the overlapping shingle again. Drive four 1 ¼-inch galvanized roofing nails into the top edge of the new shingle, just above the shingle tabs. Place these nails so they will be completely covered by the overlapping shingle above, ensuring they won’t be exposed to the elements.
- Seal the Tabs: Gently press down the overlapping shingle. For added security and to ensure a watertight seal, apply a small bead of roofing sealant under the tabs of the new shingle and any lifted surrounding shingles. This helps them adhere and provides extra protection against wind uplift. Press firmly to ensure a good bond.
Quick Fixes for Curled Shingles
Curled shingles can be a real eyesore and a potential leak hazard. The good news is that often, you can repair them without full replacement, especially if they’re not cracked or excessively brittle.
- Clean Under the Shingle: Carefully lift the curled portion of the shingle. Use a utility knife or putty knife to gently remove any debris, dirt, or old sealant from underneath. The surface needs to be clean for the new sealant to bond effectively.
- Apply Roofing Sealant: Using your caulking gun, apply a generous bead of roofing sealant (asphalt-based is best) underneath the curled section, focusing on the corners and edges that are lifting.
- Press Shingle Down: Firmly press the curled portion of the shingle down into the sealant.
- Use a Weight: Place a heavy, flat object, like a brick wrapped in a cloth (to prevent scratches), on top of the repaired section. Leave this weight in place for at least 24 hours to allow the sealant to cure and the shingle to flatten and adhere properly. If it’s cold, you might need a bit longer. In very cold weather, you can carefully warm the shingle with a flame spreader nozzle or propane torch (with extreme caution!) to make it pliable before applying sealant, but this is best left to professionals if you’re not experienced.
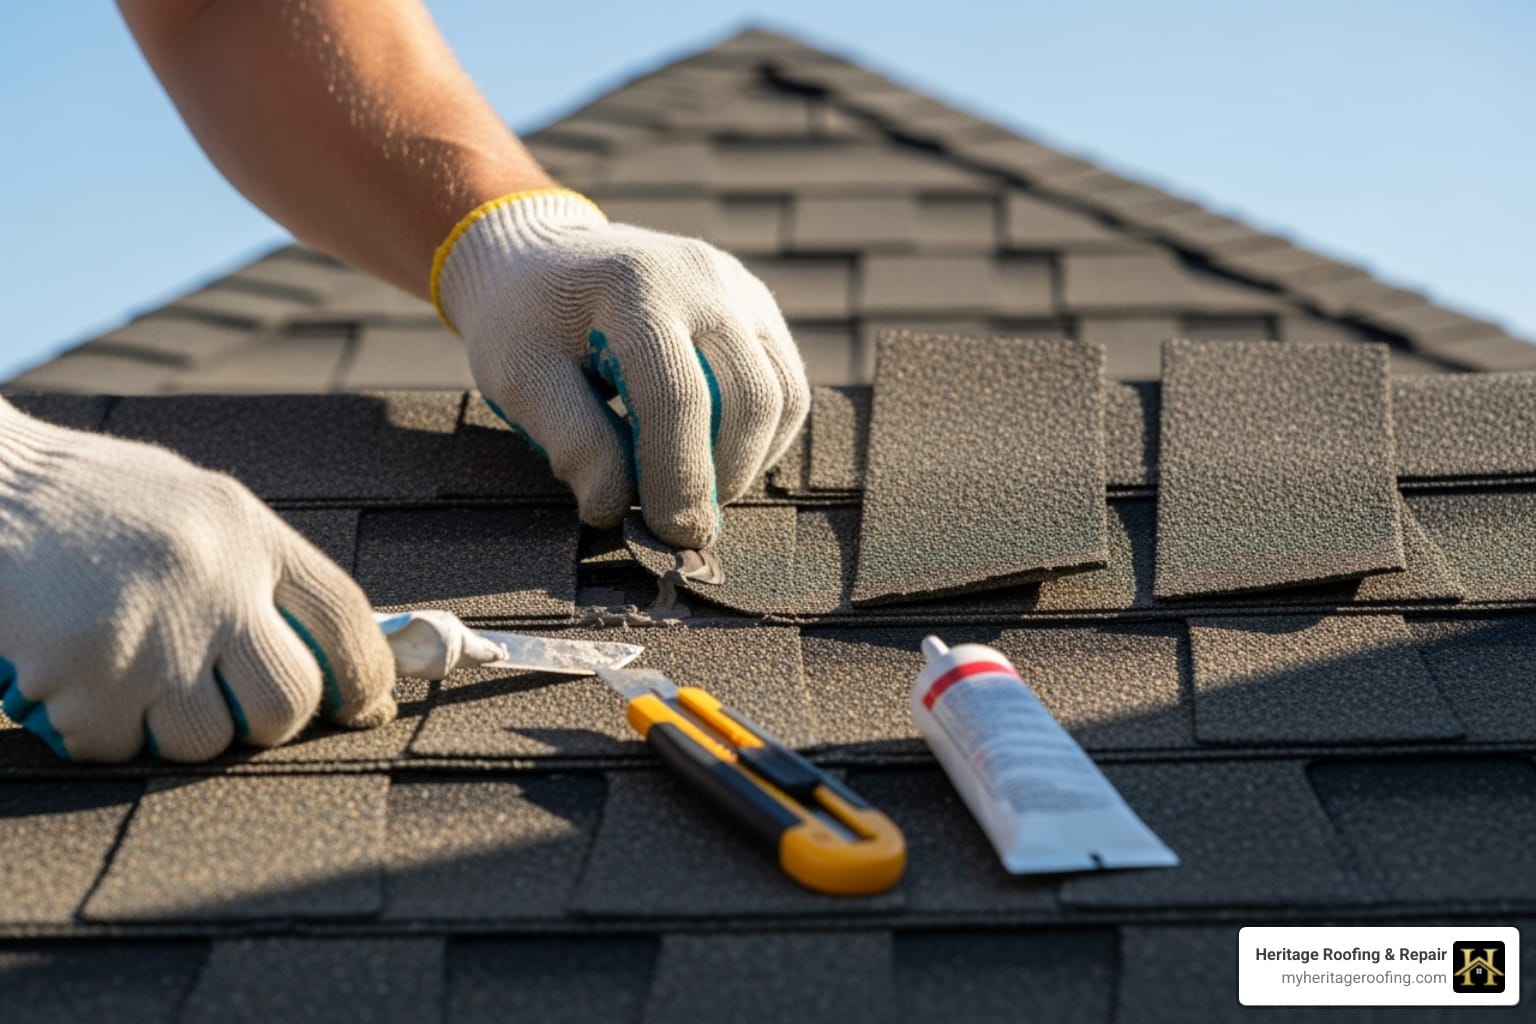
Best Methods for Cracked Asphalt Shingle Repair
Cracked or torn shingles can also be repaired, provided the damage isn’t too extensive and the shingle is still largely intact.
- Apply Sealant Under the Crack: Carefully lift the edges of the crack or tear. Apply a thick bead of roofing sealant underneath the crack, ensuring it covers the entire damaged area.
- Press Shingle Down: Press the shingle down firmly, ensuring the sealant creates a strong bond.
- Apply Sealant on Top: Apply a second, thinner bead of sealant directly on top of the crack.
- Spread with Putty Knife: Use a putty knife to spread the sealant evenly over the crack, feathering the edges so it blends as much as possible with the shingle surface.
- Camouflage with Granules (Optional): For a less noticeable repair, collect some loose granules from your gutters or from a new shingle (by gently scraping them off). While the sealant is still wet, sprinkle these granules over the repaired area. Gently press them into the sealant to help them adhere and match the surrounding shingle texture. This is a great trick for blending the repair seamlessly!
When to Call the Pros: Signs Your Roof Needs an Expert

Here are key indicators that your roof needs an expert’s touch:
- Extensive Damage: If you have multiple missing or damaged shingles spread across a large area of your roof, it’s probably beyond a simple DIY fix. Attempting to repair dozens of shingles can be incredibly time-consuming, and you might miss underlying issues.
- Sagging Roof Deck: A sagging roof deck indicates potential structural issues, possibly due to prolonged water damage or insufficient support. This is a serious problem that requires a professional assessment and repair, not a DIY patch job.
- Active Leaks with Unknown Source: While we gave you a trick for finding leaks, if you have a persistent leak and can’t pinpoint the source, or if water is actively pouring into your home, it’s time for an emergency call to a roofer. They have specialized tools and experience to trace complex leaks.
- Roof Age Over 20 Years: Asphalt shingle roofs typically last between 15 and 30 years. If your roof is nearing or past its expected lifespan, individual repairs might be just a temporary band-aid on a system that’s failing overall. A professional can assess if a full Roof Repair or replacement is the more prudent long-term solution.
- Steep Pitch: If your roof has a very steep pitch, working on it safely becomes much more challenging and dangerous. Professionals have the right safety gear and training for these types of roofs.
- Uncomfortable with the Repair’s Complexity: If you feel unsure, unsafe, or simply overwhelmed by the repair, don’t push it. Your safety and the integrity of your home are paramount.
The decision between DIY vs. Professional Roofing often hinges on the extent of the damage and your comfort level. For complex issues or if you’re in the Berryville area, it’s best to contact a trusted professional.
We’re here to help you protect your home. Here’s how you can reach us:
Heritage Roofing & Repair
3458 Arkansas State Hwy 221, Berryville, AR 72616
(870) 654-1164
Proactive Protection: Extending Your Shingle’s Lifespan
While asphalt shingle repair is crucial when damage occurs, the best defense is always a good offense! Proactive maintenance can significantly extend the lifespan of your asphalt shingles, keeping them healthy and protecting your home for years to come. Asphalt shingle roofs have a lifespan ranging from 15 to 30 years, but this can be greatly influenced by how well you care for them.
Here are our best preventative maintenance practices:
- Regular Inspections: As mentioned earlier, visually inspect your roof at least twice a year, in spring and fall, and after any major storms. Look for any signs of damage: curling, cracking, missing granules, or loose shingles. Early detection means minor repairs, not major replacements.
- Clean Gutters: This might seem unrelated, but regularly cleaning your gutters is vital for roof health. Clogged gutters can lead to water backing up onto your roof, rotting fascia boards, and even causing water to seep under your shingles. This standing water can accelerate shingle deterioration and contribute to problems like ice dams in winter. Learn more about maintaining your gutters with this guide on Clean Gutters.
- Trim Overhanging Branches: Trees are beautiful, but overhanging branches can be a roof’s worst enemy. They can rub against shingles, wearing away granules, and falling branches can cause significant impact damage during storms. Trimming them back prevents these issues.
- Proper Attic Ventilation: This is a big one, and often overlooked! The role of ventilation in maintaining the health of asphalt shingles is paramount. Proper attic ventilation helps regulate the temperature and moisture levels in your attic. Without good ventilation, heat can build up, essentially baking your shingles from underneath, causing them to age prematurely, curl, and lose granules faster. Poor ventilation can also lead to moisture buildup, which can cause mold, rot, and further shingle degradation. Adequate airflow keeps your roof cool in summer and prevents moisture accumulation in winter.
- Address Minor Issues Promptly: Don’t procrastinate on small repairs! A tiny crack can become a major leak, and a single missing shingle can lead to water damage that compromises your roof’s structural integrity. Fixing small problems as soon as you spot them is the most cost-effective way to maintain your roof.
- Manage Weather Impacts: Different seasons pose different challenges for your roof. In winter, make sure snow and ice don’t accumulate excessively to prevent ice dams. Ice dams can force meltwater under your shingles, leading to leaks. In summer, check for any signs of heat damage or sun wear on shingles, especially blistering or excessive granule loss.
- Consider Rejuvenation Solutions: Products like RoofLife’s rejuvenation solution offer an alternative to full replacement for aging shingles. This soy-based treatment can extend the life of asphalt shingles by up to 15 years by restoring their natural oils and flexibility, and it can save homeowners up to 80% compared to the cost of a full roof replacement. While not a repair in the traditional sense, it’s a preventative measure that buys you more time before a costly tear-off.
For more comprehensive advice on keeping your roof in top shape, check out our detailed Roof Maintenance Guides.
Don’t Let a Broken Shingle Ruin Your Day
We understand that dealing with roof damage can feel overwhelming, but remember, timely asphalt shingle repair is your home’s best friend. It saves you money, protects your home’s structure from water damage, and ensures your family stays dry and comfortable.
Whether it’s a quick DIY fix for a curled shingle or calling in the pros for extensive storm damage, taking action promptly is key. For those minor issues, we hope this guide has empowered you with the knowledge and confidence to tackle them yourself. For larger concerns, or if you ever feel out of your depth, please remember that we’re always here to help.
With over 50 years of trusted experience in Northwest Arkansas, Heritage Roofing & Repair is committed to providing dependable, affordable, and quality craftsmanship. We specialize in storm damage repair and insurance claims, ensuring local homeowners and businesses receive the best care for their roofs.
For expert roofing services in Northwest Arkansas, call us at (870) 654-1164 for a free inspection today.